> ## Documentation Index
> Fetch the complete documentation index at: https://docs.codenullapp.com/llms.txt
> Use this file to discover all available pages before exploring further.
# AI (Components)
> The AI Components feature allows you to create various application components (features) using AI assistance. By interacting with the AI, you can request the ge
The AI Components feature allows you to create various application components (features) using AI assistance. By interacting with the AI, you can request the generation of specific components based on your requirements. The AI can generate the corresponding JSON representation if you need a component for querying customers with a certain number of columns or any other feature. This documentation guides utilizing AI Components effectively to streamline your application development process.
### Prerequisites
Before using CodeNull Copilot, ensure that your site is enabled to utilize AI features. If you're unsure about the availability of AI capabilities on your site, please consult with the CodeNull administrator to verify and enable access.
Considerations
* This is in preview mode and it might generate incorrect data or configurations.
* **It is free so far but we are evaluating the cost impact to determine the best pricing schema for clients and us**
### Using AI Components
To create components using AI assistance, follow these steps:
1. **Access the AI Interface**: Enter the AI interface within your application development environment. This interface provides a platform for interacting with the AI to generate components.
2. **Specify Component Requirements**: Clearly define the requirements of the component you wish to create. For example, if you need a component for querying customers, specify the desired functionality and any additional details such as the number of columns to display.
3. **Interact with AI**: Engage with the AI by asking it to generate the desired component based on your specifications. You can communicate with the AI using natural language queries or predefined commands.
4. **Review Generated JSON**: Once the AI has processed your request, it will generate the corresponding JSON representation of the requested component. Review the generated JSON to ensure it meets your requirements.
5. **Preview Component (Optional)**: Some AI interfaces may offer a preview functionality, allowing you to visualize the generated component before integrating it into your application. Take advantage of this feature to ensure the component meets your expectations.
6. **Integrate JSON into Your App**: Once satisfied with the generated component, you can directly integrate the JSON representation into your application code. Copy the JSON and paste it into the appropriate configuration or code file within your project.
### how to use AI assistance
Click in any "Add a new component" button, then you will see the option Ask AI\\
**Request**: Ask the AI to generate a DataGrid component with the following specifications:
```
Generate a DataGrid component with a datasource that retrieves a list of Shifts filtered by the ID in the URL. Display fields for Start Date, End Date, Number of Registered Employees. Configure the default click action to navigate to the detail of the shift. Include a global action to create shifts from a modal.
```
Then it shows a preview of the component:
Select the generated Component (Clicking on **Open this** button) and integrate it into your application
If you want to see the generated JSON before. Then click on **Show JSON** and copy and modify it if needed
### Other prompt examples
Generate a Form
```
Necesito un formulario que me consulte la informacion de los turnos que tengo asignados como usuario de sesion, necesito que el formulario tenga los siguientes campos: Fecha inicio, Fecha Fin, Descripcion de la orden, estado de la orden, lo necesito sin el boton tipo submit
```
**Generate a Remote Drop Down with field, description, and avatar**
```
Necesito un componente tipo Field y que el fieldType sea un remote-dropdown que me consulte la lista de Usuarios y me seleccione el Id, me muestre el Nombre, el avatarField sera la Foto y el descriptionField sera el Correo, el code sera EmpleadoId
```
Generate a Details editable component
```
Necesito un componente tipo Field y que el tipo de field sea un "details", este details permitira agregar empleados
```
**Generate a DataGrid with columns and data source**
```
Necesito un componente tipo DataGrid que el datasource me traiga la lista de Turnos filtrados por la el Id en la url, los campos que necesito mostrar en el componente son, FechaInicio, FechaFin, Cantidad de empleados registrados, necesito que el defaultClick me lleve al detalle de el turno, tambien necesito que tenga un globalAction que permita crear Turnos desde una modal
```

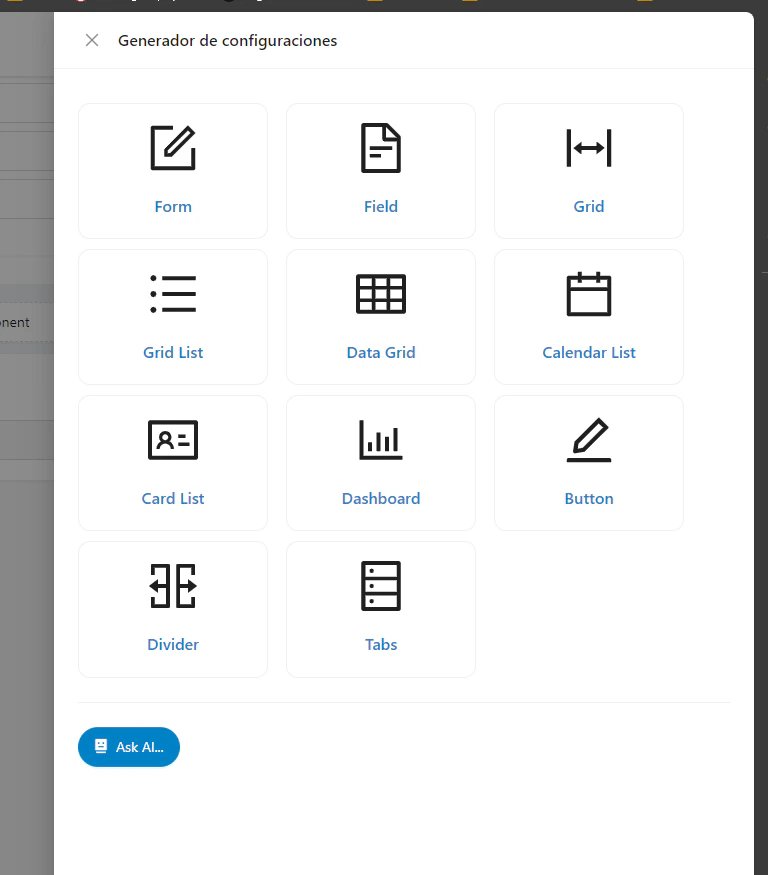 **Request**: Ask the AI to generate a DataGrid component with the following specifications:
```
Generate a DataGrid component with a datasource that retrieves a list of Shifts filtered by the ID in the URL. Display fields for Start Date, End Date, Number of Registered Employees. Configure the default click action to navigate to the detail of the shift. Include a global action to create shifts from a modal.
```
Then it shows a preview of the component:
**Request**: Ask the AI to generate a DataGrid component with the following specifications:
```
Generate a DataGrid component with a datasource that retrieves a list of Shifts filtered by the ID in the URL. Display fields for Start Date, End Date, Number of Registered Employees. Configure the default click action to navigate to the detail of the shift. Include a global action to create shifts from a modal.
```
Then it shows a preview of the component: