- Create an Import Hook
- Add an action of type Import to the feature where you want to import the data
Create an Import Hook
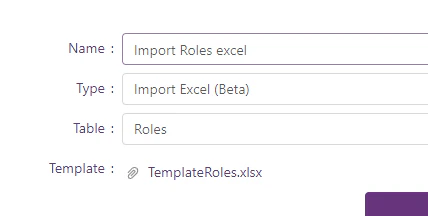
Go to ‘Application designer’ and create a new hook and we will fill up the next fields:- Name: Name of the import hook.
- Type: Import Excel
- Table: Choose a table if you want to map the excel header directly to the table columns.
- Code: Add your implementation in case you want to have your own logic to process the excel data
- Template: Upload the example template of the columns/data you want to upload. This file will be downloaded by the user once you add the action
- Save the hook
Import data directly to the table
If you want Codenull does all the job for you, you must define the header of your excel with the same names as your table has. For instance, the Roles table has only one column, “Name”. Your template header should have the same label.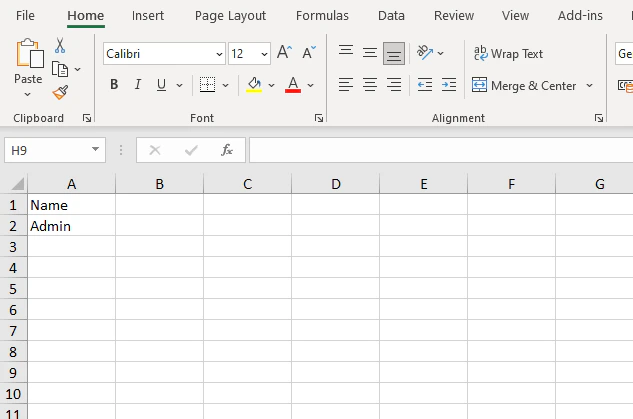
If you want to import data into multiple tables using this approach then you must define the fields of the other table separated by a dot. for instance
MyOtherTable.ColumnNameThis approach is helpful when you do not need any special logic and your excel can match with your database tables
Import data using a custom implementation
In case you have a complex scenario when you need to have a special excel or insert into some complex database model this may be a better approach. To use this don’t select a table and just add your logic to the code field. Next you can see an example:Read parameters (querystrings) from the site in the import excel hook
Add an action of type Import to your feature
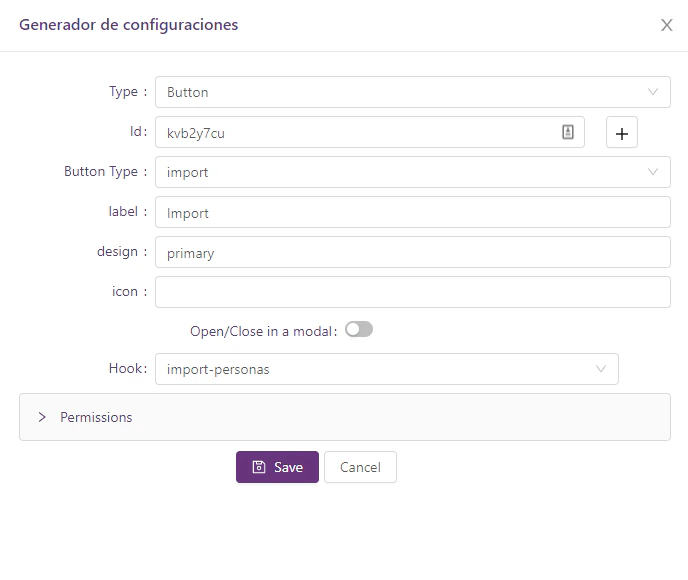
After you have created the hook you can use the import button, now Edit the feature you want to add the new action button and fill up the fields.- Type: Button
- Id: Random
- Button Type: Import
- label: Text you want to show in the button
- design: Theme color you want to show (primary, secondary)
- Hook: You have to choose the hook you created before (This only will display hooks of Import type)
-
Save the feature
- Import: Click on the left button if you want to import the data with the excel template
-
Download template: Click on the right button to download the excel template you uploaded before during the hook creation.